How to install an M.2 NVMe SSD in a desktop PC? Here is detailed guide
Installing an M.2 NVMe SSD into a desktop PC is generally considered to be a relatively easy process and we have covered a detailed guide here.
The installation process of M.2 NVMe SSD into a desktop PC is straightforward and can usually be completed by anyone with a basic understanding of PC hardware.

Most modern motherboards feature an M.2 slot, and the process of physically installing the SSD involves little more than inserting it into the slot and securing it with a screw. Here is installation guide that you are looking for.
How to install a M.2 NVMe SSD in a desktop PC? A detailed guide for easy installation
1. Identify the location of the M.2 slot on your motherboard
M.2 slots are typically located near the bottom of the motherboard, but the exact location can vary depending on the motherboard model. Refer to the motherboard manual or online documentation to locate the M.2 slot.
2. Make sure your PC is turned off and unplugged from the power source
It's important to disconnect your PC from the power source to avoid any electrical damage to the motherboard or other components.
3. Locate the M.2 screw that comes with your motherboard or SSD
Depending on the motherboard, there may be multiple screw sizes available. You will need to use the correct screw size to secure the M.2 SSD.
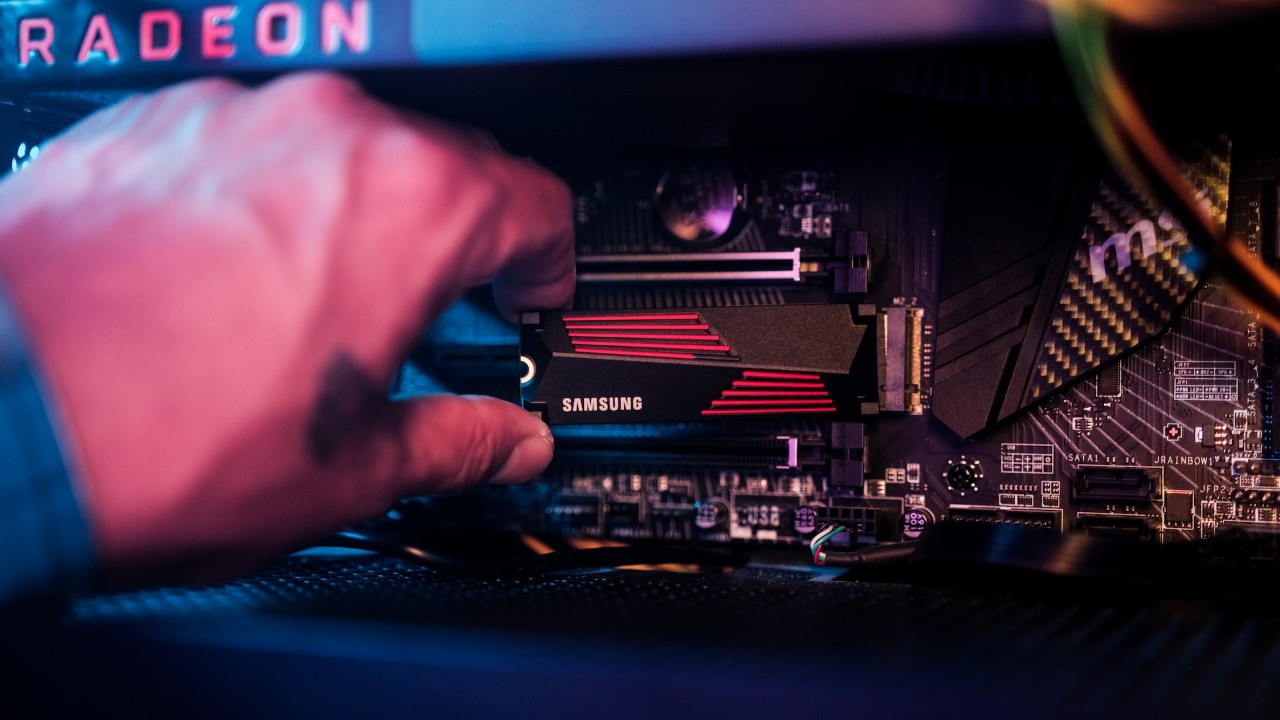
4. Insert the M.2 SSD into the M.2 slot
Align the notches on the SSD with the key on the slot and gently insert the SSD into the slot at an angle. Apply pressure until the SSD is firmly seated in the slot.
5. Secure the M.2 SSD in place using the screw
Use the screw that came with your motherboard or SSD to secure the SSD in place. Screw it in tightly, but be careful not to overtighten it, as this could damage the motherboard or the SSD.
6. Connect the M.2 SSD to your motherboard
Depending on your motherboard, you may need to remove a heatsink or protective cover to access the M.2 slot. Make sure the M.2 SSD is properly seated in the slot and the screw is tightened before replacing the heatsink or protective cover.
7. Boot up your PC and verify that the M.2 SSD is recognized in the BIOS
Enter the BIOS by pressing the appropriate key during startup (usually F2 or Del). Look for the M.2 SSD in the list of installed drives to make sure it's recognized by the motherboard.
That's it! You have successfully installed an M.2 NVMe SSD in your desktop PC. You can now use your new drive to install your operating system or store your important files.
As with any hardware installation, it's also important to follow the manufacturer's instructions carefully and take appropriate safety precautions to avoid damage to your components.
 How to install graphics card (GPU) on a desktop PCHow To


